Shown is a mold I’m just finishing up (as of August 2009). It makes a family of small dental parts using interchangeable cores and slides. I’m going to run one experimental cavity first, measure the finished plastic parts, and then cut the remaining cavities as needed to get the very tight tolerances demanded in this application.
This is a good example of a medium to high volume production mold and has fully hardened tool steel parts wherever high wear or strain will be encountered. Everything is fitted very precisely and the finished mold is expected to produce parts at the rate of 4 parts every ten seconds. A mold like this costs around $20,000.00 to build.
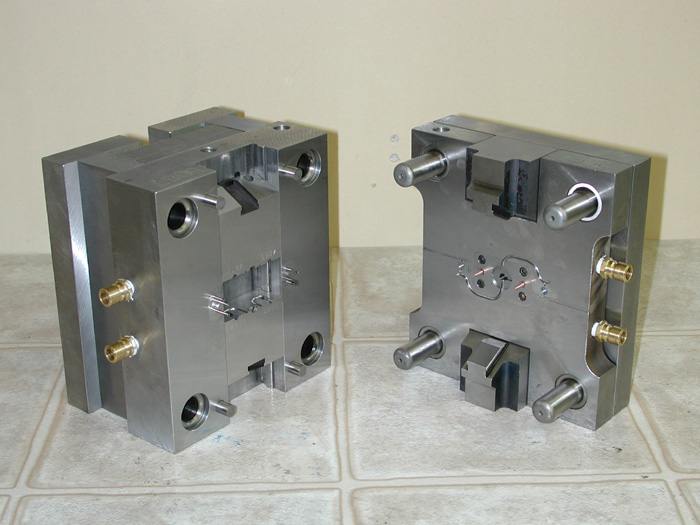
On the right is the hotside…it’s where the molten plastic is squirted in under huge pressures, about 4000 PSI for these parts. You can see the outer mold cavities, the runners and the beryllium copper cores for the center parts and the locks that move the slides and hold them against the injection pressure. On the left is the coldside. Visible are the two slides with their cavities. The slides move together when the hotside is squeezed onto the coldside by the molding press; 17 tons of clamping pressure will hold the mold halves together. You can also see the ejector pins pushed forward.

These are all the mold parts. Typical tolerances are +/- 0.0002″, so everything needs to be precision ground. Molds are highly stressed during use: the pressures are so extreme that a mold failure can cost a life, so everything is very heavily built from prehardened steel or hardened toolsteel. Also shown are some of the electrodes needed to burn the cavities and the fasteners, springs and other odd bits needed to make this tool. Two of the slides are missing; they were still in the EDM machine when the shot was taken.

Shown is one of the slides with a center mold cavity; my thumb on the right side of the shot provides scale. You can see a cavity half, and the shutoff face on which the beryllium copper core locates, also the runner and the gate which feeds plastic into the cavity.

All that to make this tiny part!! This is the same photo that is shown in the miniature machining section, and is, of course, a picture of the machined prototype part, not a molded part. I’ll update this shot when I get parts out of the mold.
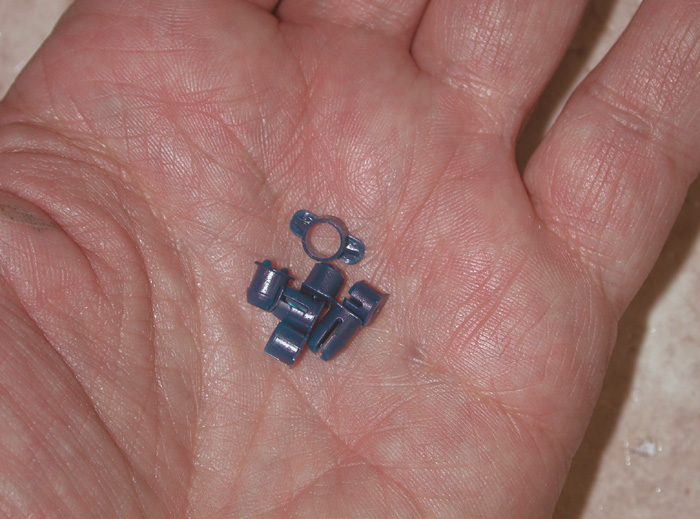
The molded parts ready for testing. There are 6 different configurations of this part. All the mold cores will now need to be tuned to make these parts fit perfectly to their mates.
Recent Comments